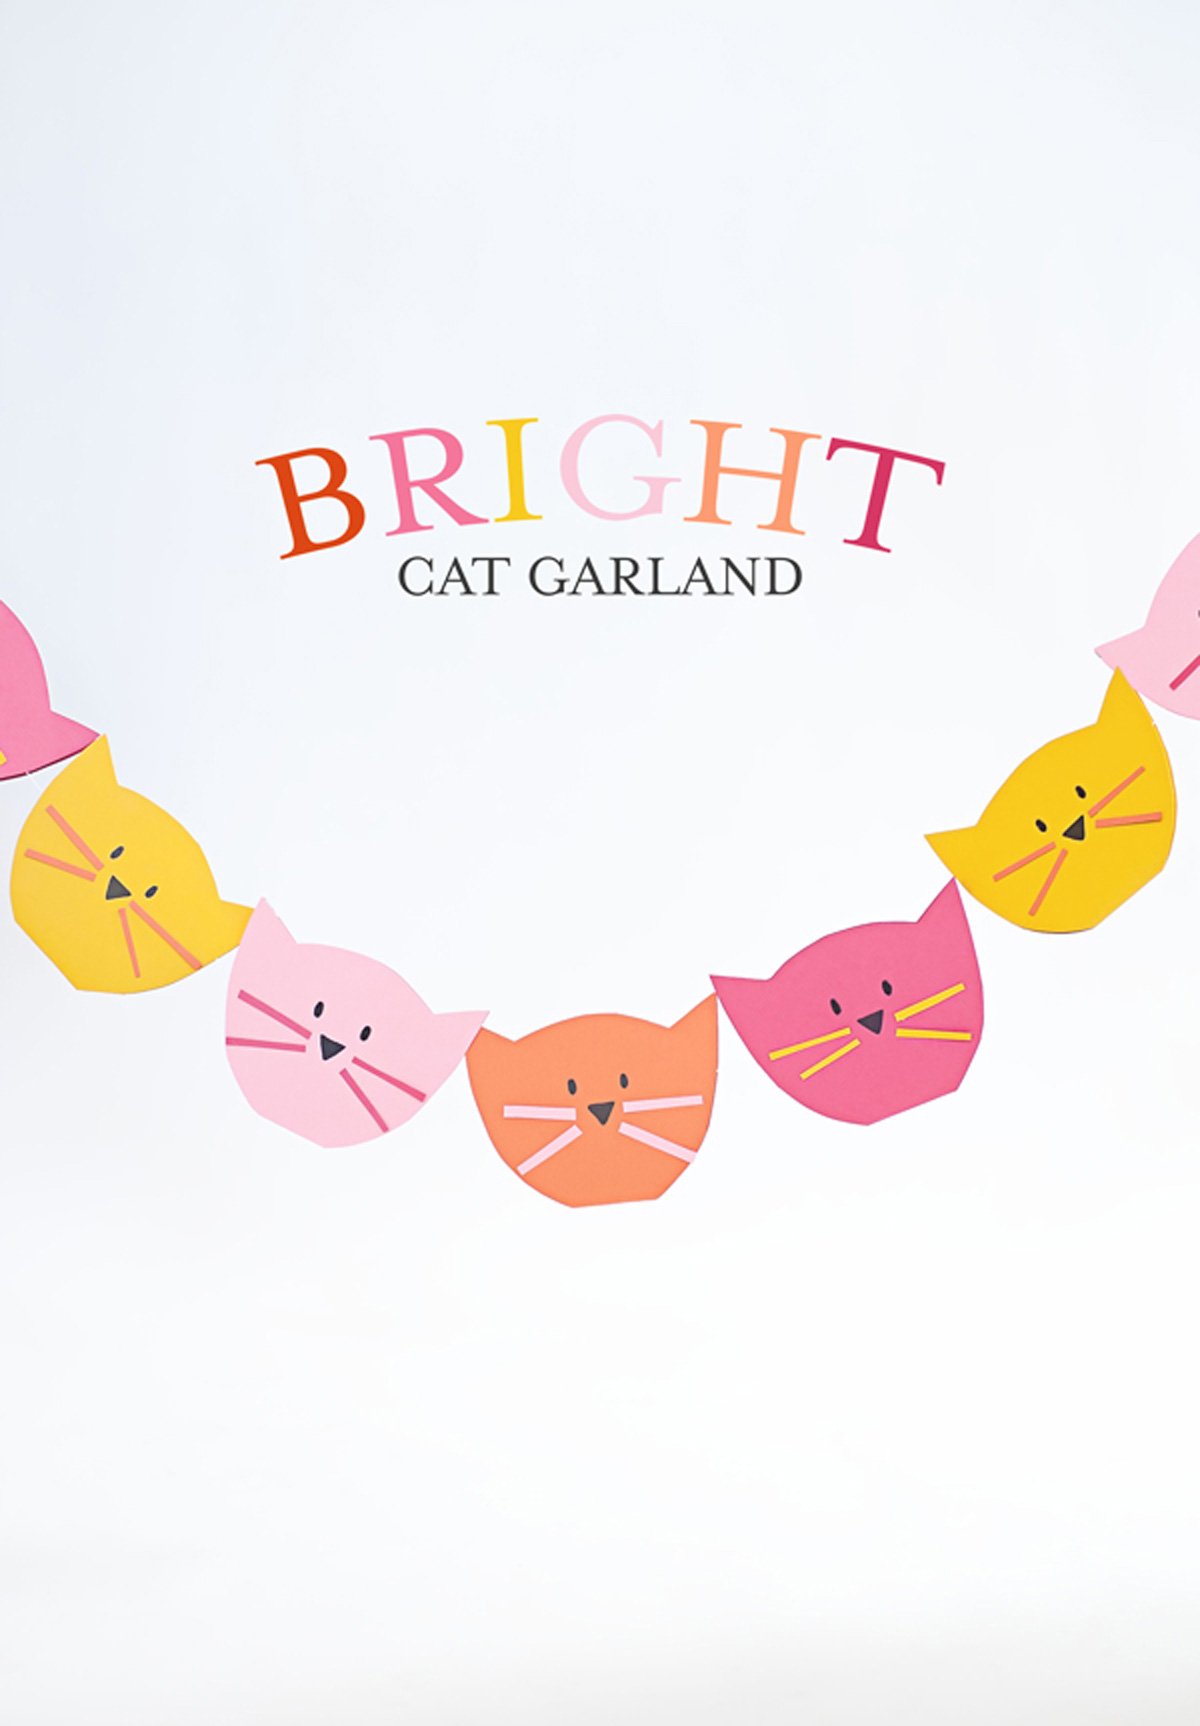
Unleash Your Inner Crafty Cat Lady: Make Adorable Cat Garland in Minutes!
Hello there, fellow cat aficionados! Are you looking for a delightful way to infuse your home with feline charm, especially during the festive season? Do your beloved furry overlords inspire every decorating decision you make? If your answer is a resounding "yes!" then you're in for a treat. Today, we're diving into the wonderful world of DIY cat garland, a simple yet incredibly impactful craft that will have your home purring with personality. Whether your cat is an aspiring ornament hunter, a string-batting champion, or a peaceful napper under the tree, this project is for you. Get ready to learn precisely how to make cat garland for all my cat ladies, transforming everyday spaces into a celebration of your whiskered companions. This isn't just about crafting; it's about celebrating the joy and occasional chaos our cats bring into our lives. From playful swatting at shiny lights to "inspecting" every new decoration, our cats are an integral part of our home's atmosphere. What better way to honor them than with a custom garland adorned with their charming silhouettes? It's a fantastic project for holidays, parties, or just adding a touch of whimsy to your everyday decor. And the best part? It's surprisingly quick and incredibly customizable, allowing you to tailor it to any theme, color scheme, or feline fancy you desire.Why Cat Garland is the Purr-fect Decor for Every Occasion
Garland, by nature, is a versatile decorative element. It drapes beautifully, adds texture, and creates a festive atmosphere wherever it goes. But cat garland? That takes things to a whole new level of adorable. Here’s why this particular craft deserves a prime spot in your home:- Unmatched Customization: Unlike store-bought decorations, your handmade cat garland can be exactly what you envision. Choose paper patterns that match your holiday theme – think classic candy canes and snowflakes for Christmas, spooky black glitter for Halloween, or bright pastels for a birthday bash. You can even select specific cat silhouettes that resemble your own beloved pets!
- A Heartfelt Tribute to Your Furbabies: Every time you look at your garland, you’ll be reminded of the special bond you share with your cats. It’s a decorative element steeped in love, celebrating the very creatures who bring so much joy (and sometimes, comical mischief) into your home.
- Versatility Beyond the Tree: While a cat garland looks absolutely delightful strung on a Christmas tree, its uses extend far beyond. Drape it across your mantelpiece, along a doorway, around windows, or even on shelves. Imagine a delicate string of cats adorning your kitchen cabinets or adding a playful touch to a child's bedroom. You can even cut out individual cat shapes without stringing them to use as unique gift tags or embellishments for handmade cards.
- An Engaging & Therapeutic Activity: Crafting is a wonderful way to unwind and express creativity. This project is simple enough for beginners but offers plenty of scope for seasoned crafters to add their personal flair. Plus, it's an activity that can even involve your cats (under careful supervision, of course!), as they'll likely be fascinated by the rustling paper and dangling string.
- Budget-Friendly Decor: With just a few basic supplies, you can create a stunning decoration that looks far more expensive than it is. It's a fantastic way to spruce up your home without breaking the bank. For more general ideas on how to spruce up your home with DIY garland, check out our guide on Easy DIY Cat Garland: Craft Cute Decor for Holidays & Parties.
Gather Your Purr-fect Supplies
To embark on your cat garland adventure, you won't need an overwhelming list of items. The beauty of this craft lies in its simplicity. Here’s what you'll need, with options depending on your preferred crafting method:Essential Supplies for All Methods:
- Cardstock Paper: This is your canvas! Choose sturdy cardstock in various colors, patterns, or textures. Double-sided paper is fantastic, as your cats will look good from any angle. Think holiday patterns (candy canes, snowflakes, festive plaids), bold colors, glitter cardstock for extra sparkle, or even patterned scrapbook paper.
- Yarn or String: The backbone of your garland. Baker's twine, thin ribbon, or even monofilament fishing line (for a "floating" cat effect) work wonderfully. Consider the color – a contrasting color can make your cats pop, while a matching color creates a cohesive look.
- Scissors: A good pair of sharp craft scissors is essential if you're hand-cutting your shapes.
- Hole Punch: A standard single-hole punch (1/4 inch or 1/8 inch) is perfect for creating holes to string your cats.
Option 1: The Speedy Die-Cut Method (Recommended for Batch Production)
If you're looking to create a lot of cats quickly and consistently, a die-cut machine is your best friend. This method is incredibly efficient and yields perfectly uniform shapes every time.
- Cat Die Cut: Look for a quality cat-shaped die. Brands like Sizzix offer a variety of adorable designs. You might find them new, or even on auction sites like eBay if a specific design is harder to come by. The key is to find a good size that stands out without being too bulky.
- Die-Cut Machine: A machine like the Sizzix Big Shot (or similar) simplifies the cutting process. These machines typically come with an extended multipurpose platform and cutting pads, which are necessary for proper operation. If you're passionate about crafts and want to make custom holiday tags, party decorations, or even embellishments for recipe photo shoots, investing in a die-cut machine can be a game-changer!
Option 2: The Accessible Hand-Cutting Method (Great for Creativity & Beginners)
No die-cut machine? No problem! Hand-cutting is a perfectly viable and satisfying way to create your garland. It offers a more organic, handmade feel.
- Cat Face or Silhouette Template: You can easily find free printable cat templates online from craft blogs (like "Pink Pop Party" or "The Flower Wife"). Print them onto regular paper, cut them out, and use them as stencils. Alternatively, if you're feeling artistic, you can freehand draw your own cat shapes directly onto the cardstock.
- Pencil: For tracing your templates onto the cardstock.
Step-by-Step Guide: Crafting Your Feline Festivities
Now for the fun part! Let's walk through how to make cat garland for all my cat ladies, whether you're using a fancy machine or your trusty scissors.Method 1: Using a Die-Cut Machine
- Prepare Your Paper: Take your chosen cardstock. If it's a large 12x12 inch sheet, you might want to cut it into smaller, more manageable pieces that fit your die-cut machine's platform and maximize paper usage (e.g., four 6x6 inch squares from one 12x12 sheet). This allows you to cut multiple cats from a single sheet.
- Assemble Your "Sandwich": The order of layers is crucial for your die-cut machine. From bottom to top, you'll typically stack:
- One Cutting Pad
- Your Cat Die (cutting side up)
- Your Cardstock Paper
- Another Cutting Pad
Refer to your specific machine's instructions if there's any variation, especially regarding platforms or shims.
- Roll It Through: Carefully feed your assembled "sandwich" into your die-cut machine and roll it through once. The machine's rollers will apply pressure, cleanly cutting your cat shape.
- Reveal Your Cat: Remove the cutting pads and die to reveal your perfectly cut cat silhouette! Repeat this process until you have as many cats as you need for your desired garland length. You'll be amazed at how quickly you accumulate a pile of adorable felines!
Method 2: Hand-Cutting with a Template
- Print & Prepare Template: Print your chosen cat template onto regular paper. Cut out the template cleanly. If you plan to make many cats, you might want to glue your paper template onto a piece of cardboard or thicker cardstock to make it more durable for tracing.
- Trace Your Cats: Place your template onto your chosen cardstock. Using a pencil, carefully trace around the edges of the cat shape. Repeat this process, arranging the templates closely on your cardstock to minimize waste.
- Cut Out Your Cats: With your sharp scissors, meticulously cut along the pencil lines. Take your time to ensure clean, smooth edges. For intricate details, smaller craft scissors can be helpful.
- Erase Pencil Marks: Once cut, gently erase any visible pencil marks from your cat shapes.
Stringing Your Garland (for both methods):
- Punch Holes: Decide how you want your cats to hang. For a more upright look, punch one hole at the top center of each cat's head. For a slightly daintier or swaying effect, you might punch two holes – one near each ear.
- Measure & Cut Yarn: Determine the desired length of your garland and cut a piece of yarn or string, adding a few extra inches for tying loops at the ends.
- String Your Cats: Thread your yarn through the punched holes. You can arrange them all facing the same direction, alternate directions, or even intersperse them with beads, small pompoms, or other decorative elements for added flair.
- Tip: To prevent the cats from sliding around too much, you can place a tiny knot on either side of each cat, or use a small dab of hot glue or clear craft glue on the back of each cat where it meets the string.
- Finish the Ends: Once all your cats are strung, tie a small loop at each end of the yarn for easy hanging.
Creative Touches & Display Ideas
Now that you know how to make cat garland for all my cat ladies, let's explore ways to personalize it and make it truly shine!- Embellish Your Felines: Don't stop at just paper! Add sparkle with glitter glue, draw on tiny faces with fine-tip markers, or give them little felt collars. Mini googly eyes can add a playful touch.
- Mix & Match Patterns: Instead of sticking to just one or two patterns, use a wider variety of coordinating papers for a more dynamic and eclectic look.
- Vary Cat Poses: If you're using templates or have access to different dies, incorporate cats in various poses – sitting, stretching, playing – to add character to your garland.
- Add Other Shapes: Intersperse your cats with stars, hearts, paw prints, or even tiny fish shapes for a truly themed garland.
- Themed Garlands:
- Holiday Specific: For Christmas, pair your cats with Santa hats drawn on or tiny jingle bells. For Halloween, use black and orange paper and add witch hats.
- Birthday Bash: Bright, bold colors with party hats or balloons drawn on the cats.
- Everyday Charm: Match the colors to your existing room decor for a subtle, yet adorable, accent.
- Unexpected Display Spots: Beyond the obvious, consider hanging your garland across a window frame, draped over a headboard, or even as a unique backdrop for a pet photography session. For more specific ideas for holiday display, check out Purrfect Holiday Decor: DIY Cat Garland for Your Christmas Tree.
A Quick Safety Note: While crafting with your cats around can be fun, always supervise them when yarn or string is present. Yarn can be a choking hazard or cause serious internal issues if ingested by curious kitties. Once your garland is hung, ensure it's out of reach of playful paws, especially if your cat is prone to batting at dangling objects. We want our feline friends to inspire the decor, not become tangled in it!
